How do I install the Canopy Filtered Showerheads?Updated 3 months ago
The Canopy Filtered Showerhead
Before you do anything, wipe down workspace! Always ensure you stay safe, that your shower is dry and you have a safe footing during install. You can use our visual assistance installation guide here.
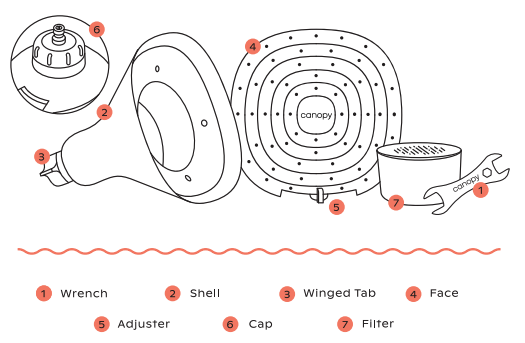
Unscrew the existing showerhead by turning it counterclockwise. You should be able to do this by hand but if you need a wrench you will find one inside the accessories kit.
Your new Canopy Showerhead comes with a filter already installed and ready to go, no need to disassemble it.
Wrap the threads of your pipe with a layer of plumbers tape included in the accessories kit. You won’t need to use the entire roll provided. (If your previous showerhead was installed with white teflon plumbers tape you may be able to leave it as is and install your new unit over it, skipping the taping step. You should be able to make this determination by sight alone. If you see any discoloration or wear, remove it and follow the steps to replace it.)
Unscrew the threaded safety cap. Leave the wire mesh gasket securely inside your unit so it will sit between the showerhead and pipe.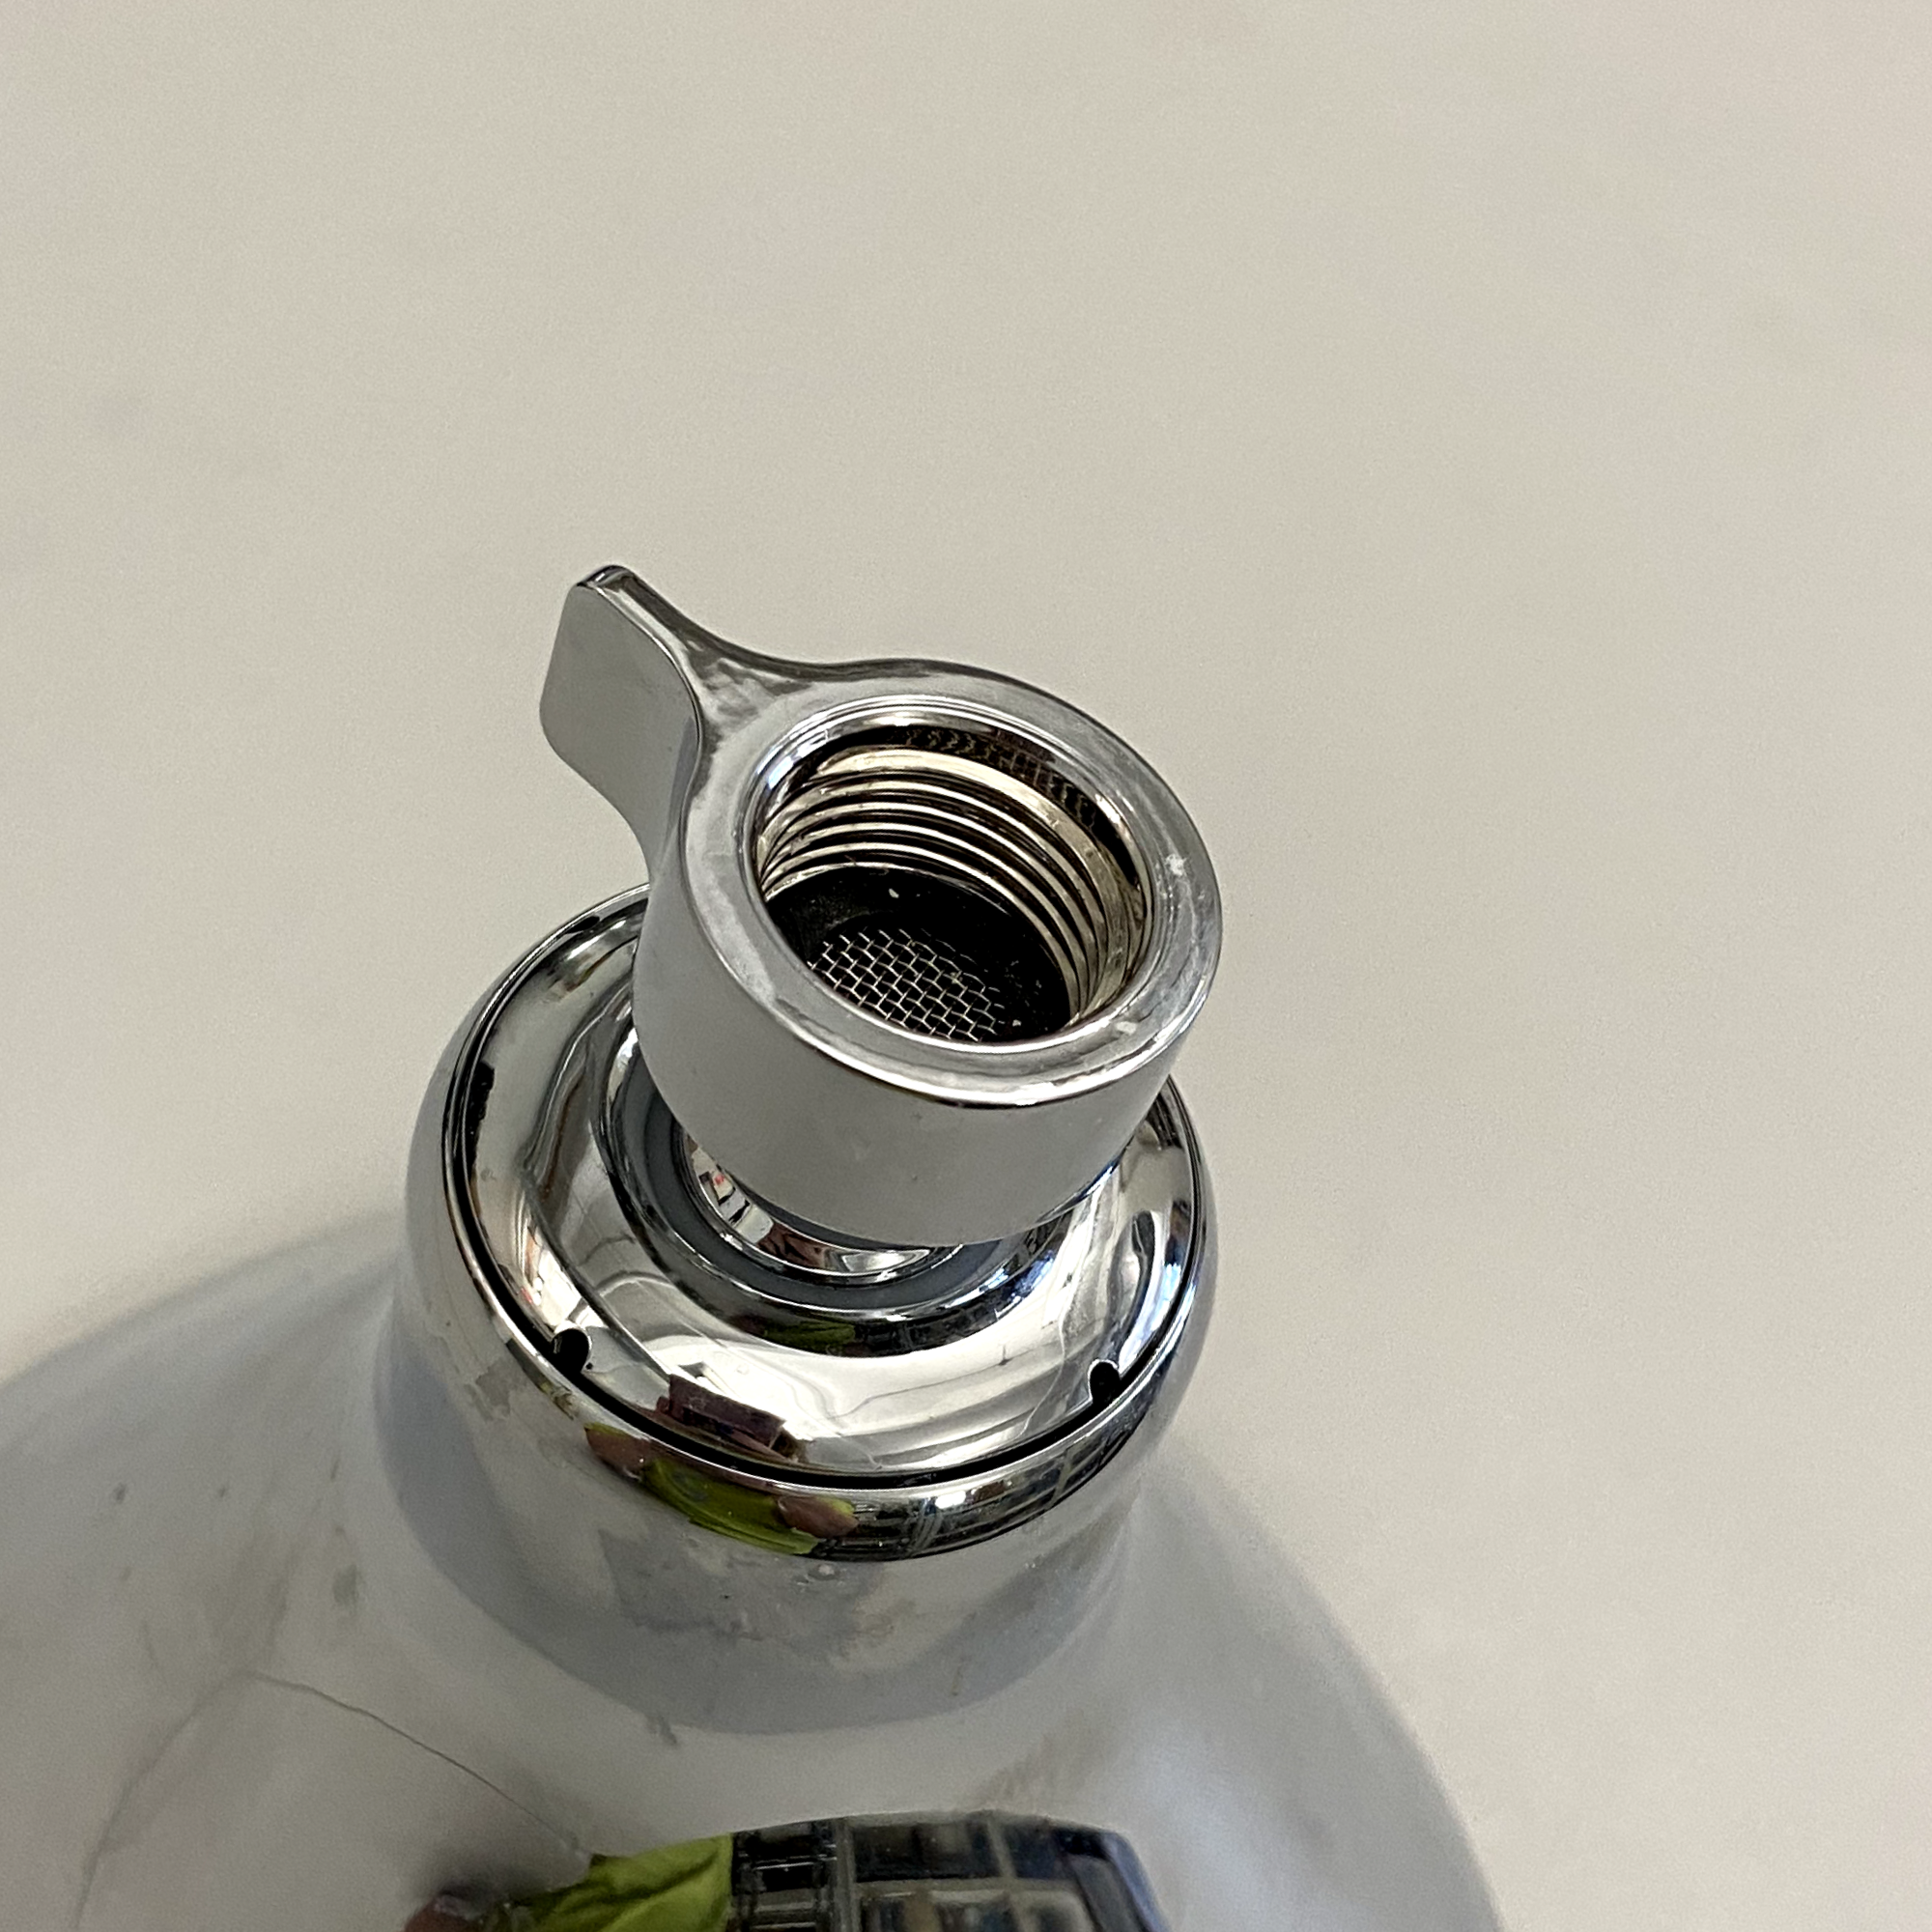
Twist the unit, clockwise, onto the pipe until secure. Use the winged tab on your showerhead for leverage to tighten. To avoid over-tightening skip the use of a wrench or tool.
That’s it!
The Canopy Handheld Filtered Showerhead
Before you do anything, wipe down workspace! Always ensure you stay safe, that your shower is dry and you have a safe footing during install. You can use our visual assistance installation guide here.
Remove existing showerhead: Turn the showerhead counterclockwise by hand to unscrew it. We’ve included a wrench if you need some extra help; just locate the grooves and turn the wrench. If there is white plumber’s tape around the pipe, completely remove any leftover threads. Run cold and hot water through the pipe for several minutes to flush out any dirt and debris from the pipes.
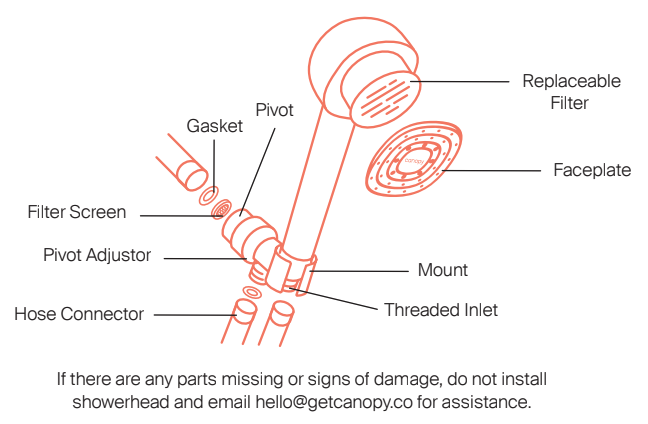
Attache the showerhead bracket: Connect the mount to the shower pipe and rotate until secure, about four times.
Connect the hose: Remove the caps from either end of the hose. Check inside the hose connectors to ensure the rubber gaskets are in place on both ends before attaching. Attach one side of the hose to the mount and the other to the Handheld Showerhead, placing the Showerhead in the bracket (filter is already installed).
Run water through the showerhead to check there isn’t a leak between the pipe and showerhead. If leaking occurs, unscrew the Showerhead and wrap the pipe 2-3 times with the included plumber’s tape to secure the seal.
Note: Let the shower run for 30 seconds to prime and flush a new filter. Water discoloration may occur at first use due to activated charcoal.
If you encounter any difficulties during the installation process or have questions about your Canopy Handheld Filtered Showerhead, don't hesitate to reach out to our customer experience team for assistance. We're here to ensure you have a seamless experience from start to finish.
Remember, you don't have to choose, Canopy showerheads can bother be installed in the same setup so long as you have a diverter. You can buy eveyrthing you need to install both with our Shower System bundle, for the best of both worlds!